Journey to the Watchtower Beginner Guide — How to Start (2026)
A first-run walkthrough for Journey to the Watchtower: finish the tutorial, claim 77,105 Insanity from codes, buy the right first upgrades, and turn early deaths into permanent progress toward the Watchtower.
Your first session of Journey to the Watchtower will not end at the Watchtower — it is supposed to end face-down in the desert. The game is an endurance run: you cross hostile sand toward a tower on the horizon while the deadly light, the tower’s own attacks, and a giant sandworm work to end the attempt. The official description states the deal plainly — "Every death makes the next journey easier." This beginner guide sequences everything a new player needs to make that promise true as fast as possible: the tutorial, the codes, the first upgrades, and the habits that separate a stalled save from a climbing Farthest record.
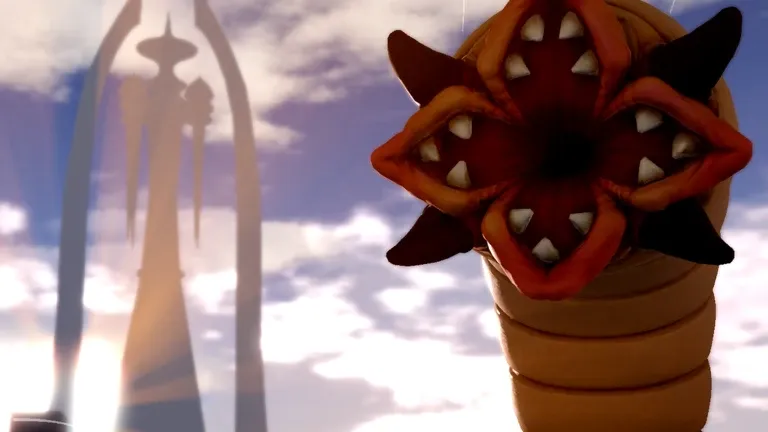
The sandworm and the tower are the two landmarks of every early run — one ends it, the other is the goal.
Finish the tutorial, then claim the codes
Play through the tutorial completely before anything else. It introduces the run’s core verbs — movement, survival, and the systems you will meet in the desert — and it gates the interface: the Store menu that holds the Codes tab does not fully unlock until the tutorial is done. Rushing past it is the most common reason a new player cannot redeem anything.
As soon as the interface opens, redeem the ten active codes: UPDATE5, MOUNTS, SKYBEAST, UPDATE4, HARDMODE, WORMNERF, UPDATE3, LIKES1K, UPDATE2, and INFINITESNIPE. Payouts are no longer uniform — between 5,000 and 10,000 Insanity each plus Essence, for a combined 77,105 Insanity — the single largest jump a fresh save can get in minutes. Open the Store icon on the left side of the screen, open the Codes tab at the bottom, and type one code at a time; codes are case-sensitive and work once per account. The codes page keeps the verified list with copy buttons, last checked in October 2026.
Why codes matter this much: without them, Insanity trickles in one death at a time. With them, you can buy the early stamina and speed upgrades immediately, and those upgrades change the outcome of your very next run. The Insanity guide explains what each purchase does in depth.
See the run before you make it
The official gameplay trailer shows the desert crossing, the deadly light, and the Watchtower waiting at the end — useful context before your first attempt.
Spend your first Insanity on stamina and speed
The official description names three upgrade lines: stamina, speed, and Insanity gain. For a beginner the first two are survival. Stamina determines how long you can keep moving through the desert heat before the run collapses. Speed determines whether you can escape the sandworm — the hazard that ends most early attempts — and slip the tower’s strikes. If your runs fade out mid-desert, buy stamina; if the worm eats you, buy speed.
Insanity gain is the compounding line: it raises how much Insanity every future run produces. Once you survive reliably, alternate it in — the earlier it starts paying, the faster the whole economy grows. Avoid spreading Insanity evenly across all three lines at the start; fix the stat that is actually killing you, then diversify.
The currency itself, the Orbs that appear in code rewards, and the honest limits of what is known about the Spirits and Sins rolls are all covered on the Insanity currency guide.
Learn the three things that end your run
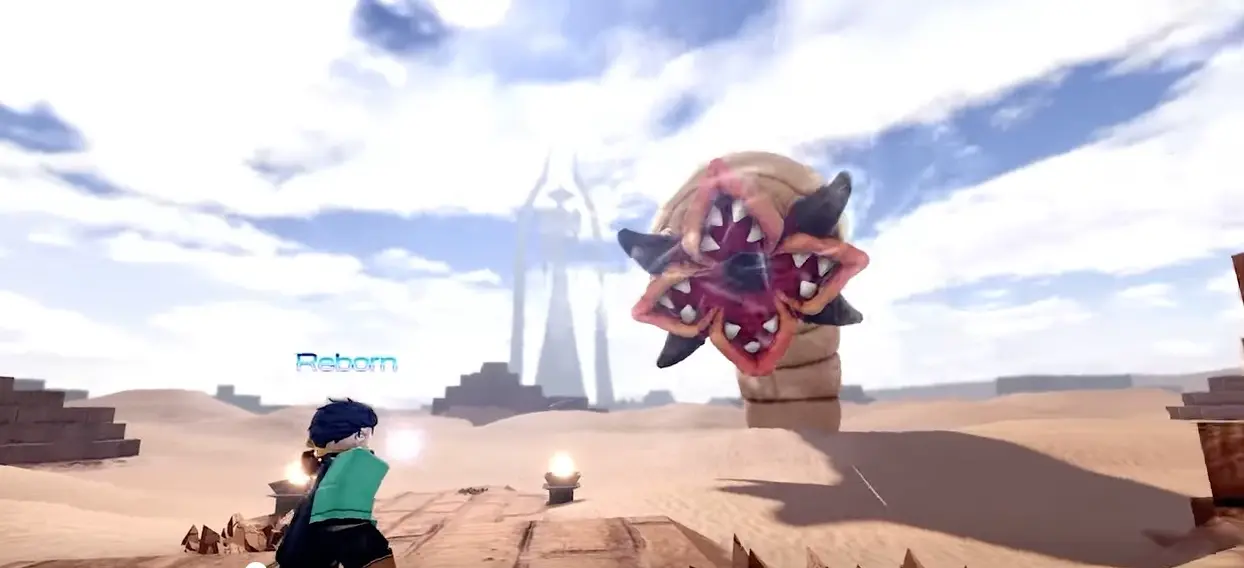
Everything dangerous in the desert falls into three categories. The deadly light punishes careless exposure as you cross open sand. The Watchtower’s attacks rain down the closer you push toward the goal — the tower is the destination and the antagonist at once. And the sandworm is the run-ender beginners meet first: coverage of the game describes the whole experience as the question of how far you can get before the worm devours you.
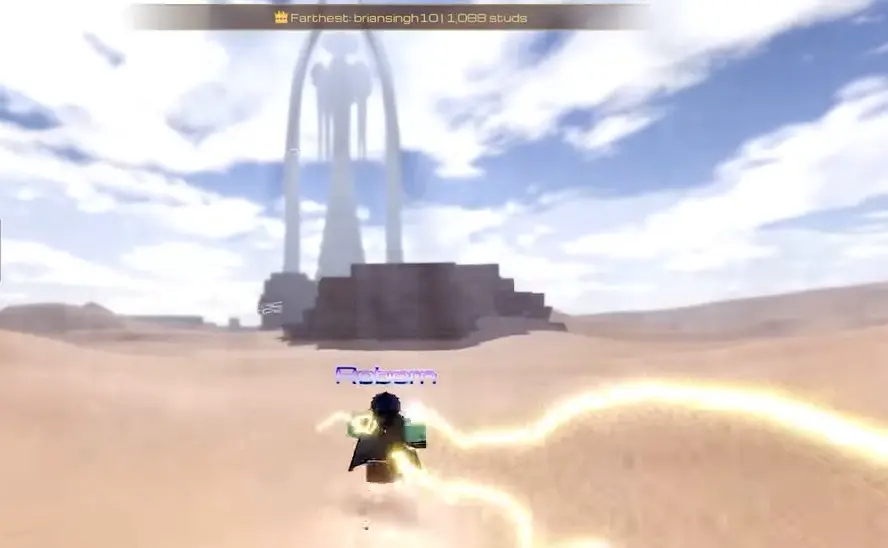
You cannot out-skill these hazards on a fresh save, and no guide can swap that order: survival comes from the stat lines you buy with Insanity, not from movement tricks. Watch how each attempt ends — fading out, struck down, or eaten — and let that answer which upgrade the next Insanity goes to. The server HUD’s Farthest record, measured in studs, is your objective report card; early records in the hundreds of studs are normal, and pushing past a thousand is what the progression loop is for.
Die, upgrade, rebirth, repeat
The loop that makes Journey to the Watchtower work is documented in its own description: upgrade your stats, roll Spirits and Sins for power, and "♻️ Rebirth to become permanently stronger." The listing confirms permanent strength from rebirth, but does not document the cost, multiplier, or which resources carry over. If your Farthest record stalls, inspect the rebirth option alongside ordinary upgrades. Read the current reset rules before deciding what to spend or whether to confirm.
The full decision — when to reset, what the code history says about free Rebirths, and what remains unverified — is on the rebirth guide. For a condensed version of this whole page in one sitting, the first hour guide plans a realistic opening session, and the run basics guide covers the mechanics in more depth.
FAQ
What should a new player do first in Journey to the Watchtower?
Finish the tutorial before anything else. It teaches the run’s basic rhythm and, just as importantly, unlocks the full interface — the Store menu with the Codes tab does not open for players who skip it. After the tutorial, redeem the ten active codes for a combined 77,105 Insanity.
Which upgrades should I buy as a beginner?
Stamina and speed are the two beginner priorities. Stamina keeps you crossing the desert before the run collapses, and speed decides whether you escape the sandworm and the tower’s strikes. Alternate in the Insanity-gain upgrade once you can survive reliably, because it raises the payout of every later run.
Why do I keep dying so early?
Because that is the intended curve. The deadly light, the Watchtower’s attacks, and the giant sandworm are tuned to end early runs, and the official description promises that "every death makes the next journey easier." Distance is measured in studs on the server’s Farthest HUD — a first record in the hundreds of studs is normal, and upgrades plus rebirth are how it climbs past a thousand.
What are Spirits and Sins for a beginner?
They are the game’s roll system — the official description says "Roll powerful Spirits & Sins." No verified list of individual Spirits or Sins, tiers, or rates exists in any checked source, so read the roll interface in-game and be skeptical of sites publishing detailed tables.
When do I rebirth as a beginner?
A stalled Farthest record is a reason to review your options, not a verified reset threshold. Check the current rebirth cost, reward, and resource-retention rules before spending or confirming. The checked sources do not establish whether Insanity or upgrades carry over; the rebirth guide explains that uncertainty.
What does [MOUNTS] in the game’s title mean?
The Roblox listing currently titles the experience "[MOUNTS] Journey to the Watchtower" and the Games API reports a last update on October 7, 2026. The prefix read "[SKY BEAST] Journey to the Watchtower" for the ten checks before October 5, when this rename appeared. Detailed patch notes for that title change have not been published in checked sources, so treat specifics as unconfirmed until the developer posts them.
Sources and verification
These links show where this page's factual inputs came from. Community and independent references are not developer announcements.
- Roblox experience listing (Official) - Game identity, creator, player limit and public experience description
- Pro Game Guides codes list (Community) - Active and expired code lists refreshed October 4, 2026 and unchanged in the October 10 check; it lists only UPDATE5 and MOUNTS as active — the two strings it labels NEW — and files SKYBEAST, UPDATE4 and the six September 1 strings together in its inactive column, so it demotes the pair it used to keep
- Twinfinite codes list (Community) - Code status cross-check refreshed October 4, 2026 and unchanged in the October 10 check, listing only UPDATE5 and MOUNTS as active — both marked New — and filing SKYBEAST, UPDATE4, UPDATE2, INFINITESNIPE, UPDATE1, BUGFIXES and RELEASE as expired
- PCGamesN codes guide (Community) - Code status and reward cross-check; a new refresh dated 2026-10-07T13:18:14Z lists only UPDATE5 and MOUNTS as active, so the six working strings it carried on September 27, 2026 (SKYBEAST, UPDATE4, HARDMODE, UPDATE3, WORMNERF and LIKES1K) have moved down and its four-of-six position is gone. Unchanged in the October 10 check
Page inputs checked .
Recommended guides
Data source: Official Roblox experience description and Games API snapshot, cross-checked against community coverage. Last verified .